
DISCLAIMER: mywiffiext.net is an independent service provider of technical support services for various third party brands and does not own any of the brands we support. Use of names, trademarks is for reference only. Technical support for Netgear is available for free on Netgear official site.
Netgear WN2500RP Extender
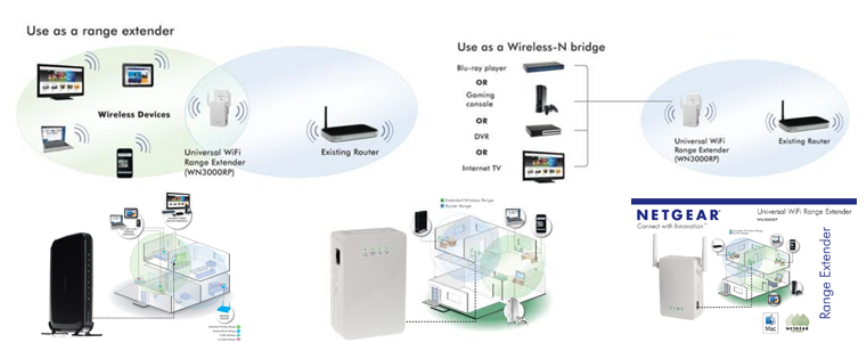
Netgear WN2500RP WiFi range extender increases the range of your existing WiFi coverage. It gives you the facility of connecting multiple devices at the same time (wired or wireless).
The extender when connected with router provides you the best WiFi connection for your devices like laptops, smart TVs, smartphones, computers, etc.
Netgear WN2500RP range extender comes to you along with:
* An Adapter
* Plastic Feet
* The User Manual (for setup)
MANUAL STEPS:
* On any of your wired or wireless devices, connect to extender’s WiFi network.
* After selecting the WiFi network, open a web browser (Google Chrome, Mozilla Firefox or Safari app if you are using iPad or Mac). In the address bar, type www.mywifiext.net.
* It will ask you to log in the default details which you need to provide here.
* Take your curser to “New Extender Setup” and click it.
* A page displays, which asks you to fill the details named “Create Account”.
* Click “Next” and then hit on the icon “WiFi Range Extender”.
* Your next step requires to select the name of your existing WiFi network by entering the password of it.
* Click “Next”.
* To your newly extended network, connect one of your wired or wireless devices with it.
* Click “Continue”.
If you need to change the settings of your extended network:
* Just go to “Restore Factory Settings” button on your extender.
* Once the light starts blinking, wait for the power LED illuminate solid “green”.
* Repeat the process once again of “Network Setup” to have a different extended network for WN2500RP.
Still facing issues? Unable to configure or set up your WN2500RP range extender? /strong>